Friday, November 30, 2012

In the Garden Spotlight: Spaghetti Squash

You see, there is a method to my madness!  The 3 Sister's Method growing Corn, Beans and Squash.


The new variety of squash at 
Mary's Heirloom Seeds is the Spaghetti Squash and is a winter variety.  
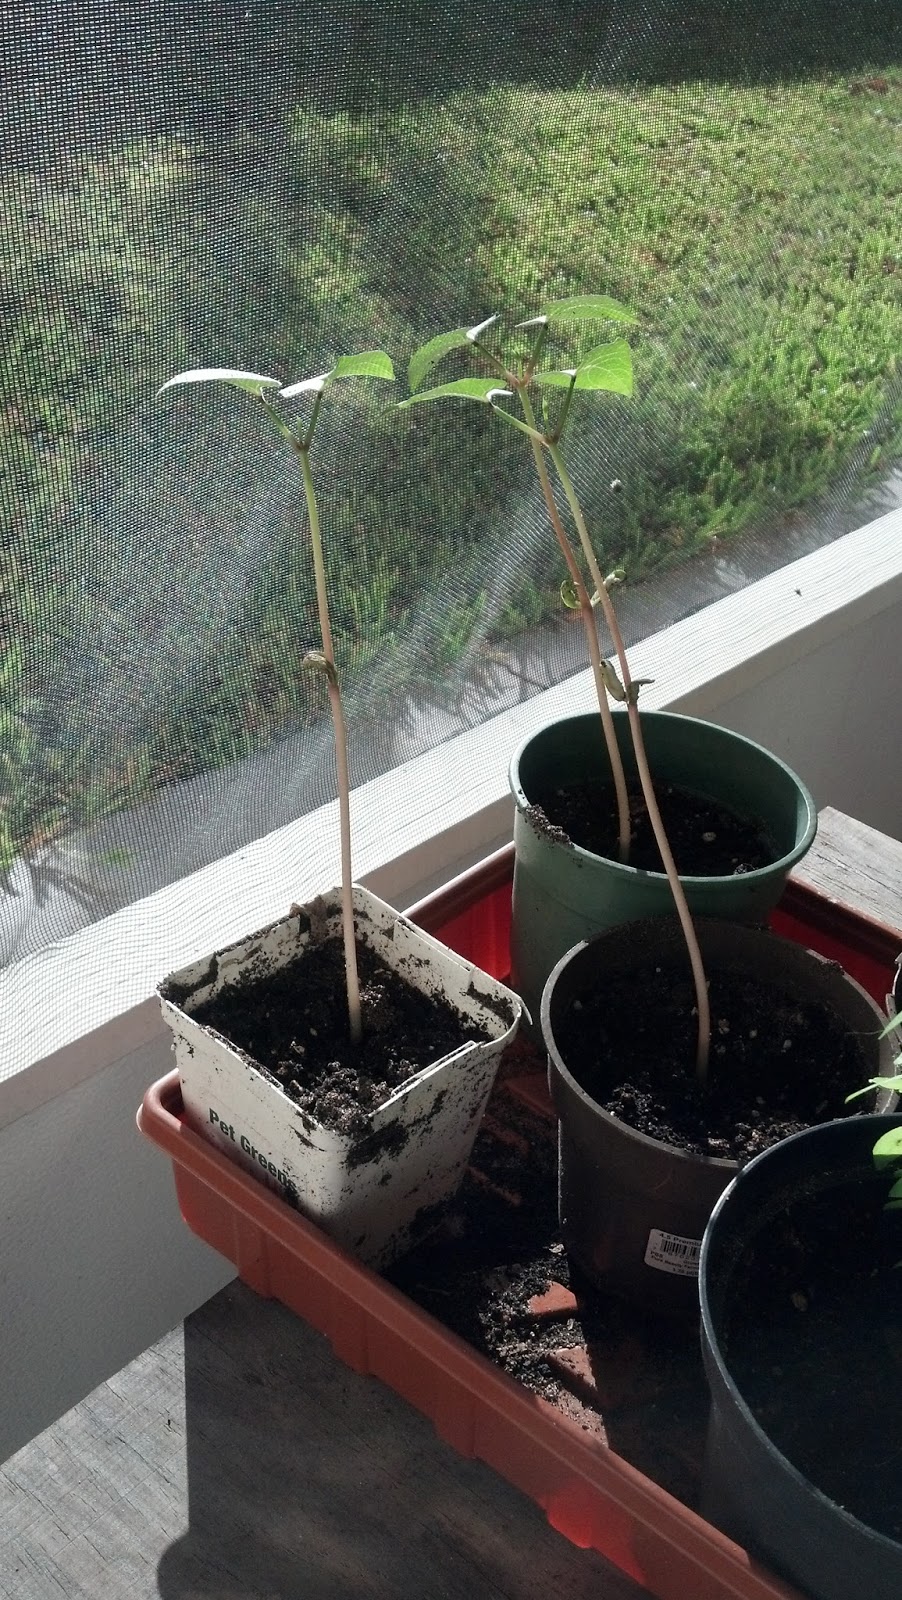
I am really looking forward to growing these gorgeous cucurbita! 
88 days.  Introduced in 1934.  Easy to grow.
This is a very popular squash with stringy flesh that can be used like spaghetti.  Squash is ripe when they turn yellow and sound hollow when thumped.


Companion plants for squash are: Beans, corn, cucumbers, icicle radishes, melon, mint, onions and pumpkin. Helpers: Borage deters worms, improves growth and flavor. Marigolds deters beetle.  Oregano provides general pest protection. Dill may repel the squash bug that will kill your squash vines.

From the Growing from Seed page:

In spring, sow seeds in prepared beds or hills after your last frost has passed, or sow them indoors under bright fluorescent lights. Set out seedlings when they are about three weeks old. In Zone 6 and warmer, you can plant more winter squash in early summer, using space vacated by fall-planted garlic or early spring lettuce. Stop planting winter squash 14 weeks before your expected first fall frost.

How to Plant Winter Squash
Winter squash grows best in warm conditions, in fertile, well-drained soil with a pH between 6.0 and 6.5. Choose a sunny site and prepare 3-foot-wide planting hills within wide rows, or position them along your garden’s edge. Leave 5 to 6 feet between hills. Loosen the soil in the planting sites to at least 12 inches deep. Thoroughly mix in a 2-inch layer of mature compost and a light application of balanced, organic fertilizer. Water well. Plant six seeds per hill, poking them into the soil 1 inch deep. After seeds germinate (about 10 days after sowing), thin seedlings to three per hill. Set up protective row covers as soon as you’re done planting.

Harvesting and Storage
Fruits are ripe if you cannot easily pierce the rind with your fingernail. Never rush to harvest winter squash, though, because immature fruits won’t store well. Unless pests or freezing weather threaten them, allow fruits to ripen until the vines begin to die back. Expect to harvest three to five squash per plant. Use pruning shears to cut fruits from the vine, leaving 1 inch of stem attached. Clean away dirt with a soft, damp cloth, and allow fruits to cure for two weeks in a spot that’s 70 to 80 degrees Fahrenheit. Store cured squash in a cool, dry place, such as your basement, a cool closet or even under your bed. Check every two weeks for signs of spoilage.

Winter squash face challenges from squash bugs, squash vine borers and cucumber beetles. To defend your plants from all three insects, shield them with row covers held aloft with stakes or hoops until the plants begin to bloom. Big, healthy plants will produce well despite pest pressure. Among diseases, powdery mildew is a common problem best prevented by growing resistant varieties, which often have “PMR” (for “powdery mildew resistance”) after their variety names. In addition, a spray made of 1 part milk and 6 parts water can suppress powdery mildew if applied every two weeks during the second half of summer.

Winter Squash Growing Tips and Ideas
Grow open-pollinated varieties so you can save your own seeds for eating and replanting. Only choose hybrids if you need a space-saving bush habit or a special form of disease resistance.

Try growing winter squash in an old compost pile located along the edge of your garden. Small-fruited varieties do well if allowed to scramble up a fence.

This is a Garden Spotlight Series:

Ends December 4th at Midnight!

Thursday, November 29, 2012

In the Garden Spotlight: Beans

If you would like to start your own garden or add to your collection of seeds, check out the Seeds in a Stocking Giveaway going on now.  Includes your choice of 3 varieties of heirloom seeds, a mini-stocking and a holiday card for you to personalize (in case you decide to give as a gift).
Blue Lake Beans (like you buy in the store)
60 days.  This dark-green bean has been a favorite for over 40 years.  Heavy yield.  Matures its large crop early and all at once.  Stagger planting for longer harvesting.
Developed from the Pole Blue Lake

I mentioned the Three Sister's method when growing Sweet Corn in the last spotlight.  This is similar to companion planting.  It is a garden practice used by Native Americans when growing Corn, Squash and Beans.
 
From Wikipedia:  "The three crops benefit from each other. The maize provides a structure for the beans to climb, eliminating the need for poles. The beans provide the nitrogen to the soil that the other plants utilize, and the squash spreads along the ground, blocking the sunlight, helping prevent establishment of weeds. The squash leaves also act as a "living mulch", creating a microclimate to retain moisture in the soil, and the prickly hairs of the vine deter pests. Maize lacks the amino acids lysine and tryptophan, which the human body needs to make proteins and niacin, but beans contain both and therefore maize and beans together provide a balanced diet."
Golden Wax Bean
55 days.  Old-time favorite introduced in 1900.  Excellent quality and yields. 
Stringless pods are 5-7 inches long with delicious wax bean flavor.  Good for freezing or canning.

This year I have added several bean varieties!  The Kentucky Wonder or "Old Homestead" is a pole variety.  The Blue Lake Bush, Royalty Purple Podded and Golden Wax are all bush varieties.
Kentucky Wonder Bean
65 days.  Pole Bean variety.  Introduced in 1864, this bean was originally known by the name 'Old Homestead.'  What made the 'Kentucky Wonder' a wonder was, in part, its size. The beans are extraordinarily long.  They produce beans in clusters over an extended season.

Royalty Purple Podded
 56 days.  Bush variety.  Tender, bright purple pods turn green when cooked. 
Prolific producer and a good home garden variety.  Beautiful addition to your garden and very tasty.  Plant a row every three weeks until July for a long harvest period.
Royalty Purple Beans are a nude color
I recently added the Royalty Purple to my own garden.  I soaked the beans for 3 hours before I planted them and the germination was much faster and more successful.  Living in South Florida allows me to try different varieties throughout the year.  I am looking forward to purple beans in another 37 days or so.

Bean seedling at approx day 19
From the Growing from Seed page: 

For the sake of simplicity, I classify beans in 2 categories: Bush and Pole.

Bush beans are usually compact and grow close to the ground. Pole beans climb and require a trellis or other support. Bush beans tend to produce more beans in a shorter time, while pole beans will produce more over an entire season. Pole beans typically require much less.

Two weeks before planting, work compost or fertilizer into a garden spot that receives full sun. Well after the fear of frost has passed, use a garden hose to lightly moisten the soil. Plant bean seeds directly into rich, fast draining soil in spring after the soil has warmed. For bush beans, form 1inch-deep furrows and place beans every few inches. For pole beans, position the trellis or bean teepee before planting the seeds. Plant several seeds in each 1-inch furrow.  Cover all seeds with soil and water well. 

Keep the soil moist until the seeds germinate. When seedlings sprout, carefully thin them to one plant every 6" to 8". Apply a generous layer of mulch around the plants to conserve moisture and prevent weed growth. Bean plants need about 1" of water per week. They should be watered in the morning so the foliage has time to dry before dark. Fertilize bean plants with an organic fertilizer every two weeks for the first six weeks, then once every three to four weeks. Keep an eye out for bean beetles, which are easily picked off by hand and terminated.

The plants require full sun and regular water. In general, bush beans mature faster and are less sensitive to drought and extreme temperatures than pole beans. Provide support for vines in the form of a trellis or pole.

Tip: Never work around bean plants when they are wet. Disease can quickly spread from plant to plant, destroying an entire crop. 

Bush beans are ready to harvest in 50 to 60 days, while pole beans take between 60 and 90 days. Beans should be harvested when the pods are 4" to 6" long. Beans that stay on the plant too long are much less tender and flavorful. Beans should be harvested frequently, even daily, to encourage continued production. Simply pull the pods from the vine to harvest, but try not to knock the blooms off the plant

Are you enjoying the In the Garden Spotlight series so far?  I appreciate all of the feedback so far.  See you tomorrow!

Wednesday, November 28, 2012

In the Garden Spotlight: Sweet Corn

I wish I had planted Sweet Corn last year.  I thought I didn't have to room but I was wrong.  Had I read more about the Three Sister's method I would have planned ahead and made it happen.  I recommend Heirloom Seeds ONLY.  Sweet Corn is a very common GMO crop and I refuse to poison my garden with it!


The 2 varieties I have chosen are Stowell's Evergreen and Country Gentleman Sweet Corn.
Stowell's Evergreen Sweet Corn
90-110 days.  Released commercially in 1856.
This delicious white sweet corn is regarded as the "King of All White Sweet Corn Varieties", has been popular for over 162 years.  

Stowell's Evergreen matures slowly over a long period, extending the usual harvest and produces 9 inch ears with 16 to 20 rows of plump, sweet white kernels.
It has a good shelf life, and is a good option for eating fresh, canning or freezing.

Country Gentleman Sweet Corn
90 days.  The ears reach 7-8 inches long and produce a sweet and delicious, white kernel.  The ears have no rows, as this is a shoepeg type, and kernels are packed in a zigzag pattern.  Country Gentleman was introduced around 1890 by Frank Woodruff & Sons.  One of the best heirloom sweet corns.

As you can see, the Stowell's Evergreen has uniform rows while the Country Gentleman rows are a zigzag pattern.

Companion Plants for Sweet Corn are: Amaranth, beans, cucumber, white geranium, lamb's quarters, melons, morning glory, parsley, peanuts, peas, potato, pumpkin, soybeans, squash and sunflower.

From the Growing from Seed page:
To ensure an early crop, sow sweet corn seeds either indoors or in a heated greenhouse.  I recommend using Peat Pellets or something like it do the delicate roots are not disturbed.  Corn does not transplant well.
Seeds should be sown in warm conditions, covered very lightly (depth of ¼ inch) and kept reasonably moist until seedlings emerge. 

The sweet corn seedlings should germinate after 10 – 12 days, and once they have fully emerged the weakest seedling from each pot should be removed.  If you choose to direct-sow, thin Seedlings 6-8 inches apart.
Water well and if they are being germinated indoors - move to a warm, bright windowsill.
Do not over water.
The young Sweet Corn plants can be planted into their final positions once all danger of frost has passed – around the middle of May, but remember that they will need to be hardened off for a week or so before hand. This can be achieved by either bringing them back under protection over-night or placing them under a cloche or poly-tunnel outside.
Plant corn in well-drained soil with lots of organic matter.  Grow in full sun.  Mulching around your corn will help keep the free of invasive weeds during the summer.  Plant with beans, cucumber, melons, morning glory, potato, pumpkin, soybeans, squash and sunflower.  For complete details, read Companion Planting 101.
Non-gmo Sweet Corn seeds
 I know it's almost December and most of you are thinking about buying gifts and decorating for Christmas.  Me?  I'm thinking about what I'd like to grow in the Spring.  In order to get the best harvest with the least issues you must plan ahead!

Tuesday, November 27, 2012

In the Garden Spotlight: Pink Oxheart Tomato

I've grown the Cherokee Purple, Amana's Orange, Marglobe, Ace 55 
and the Red Fig tomatoes so far. I am absolutely thrilled to try the 
Pink Oxheart!

85 days.  Vigorous vines produce large bunches of huge pink tomatoes in the shape of an oxheart.  Tomatoes are very meaty and flavorful.

Popular with old timers, a good all-purpose variety.  
Great for processing or sliced for a sandwich. 
In my own garden I choose to use the Companion Planting method for organic pest control and healthy tomato plants.  

Companions for tomatoes are asparagus, basil, bean, carrots, celery, chive, cucumber, garlic, head lettuce, marigold, mint, nasturtium, onion, parsley, pea, pepper, marigold, pot marigold and sow thistle.  I use marigolds (calendula), lots of green and purple basil and borage for pest control.

From the Growing from Seed page:
There are two basic kinds of tomatoes: Determinate and Indeterminate.


Determinate tomatoes produce the fruit all at once. These are typically bush tomatoes, and make the best tomatoes for container gardening. Since all the tomatoes are ripe within a short period of time, these are great plant choices if you plan to can or have a short tomato growing season.
Indeterminate tomatoes grow on a vine. They will produce all season until the first frost.

Preferred Growing Conditions
Tomatoes love sun, and lots of it. Determinate or bush tomato plants work best for tomato container gardening. Soil should be rich in organic matter. Compost works best mixed in with the soil, and is a great organic fertilizer. Tomatoes tend to do well in soil that is a little acidic. Get a soil pH tester if you are unsure of your soil’s pH level.
Mulch will be important around tomato plants. Since tomato plants prefer full sun, the soil will dry out. Mulch will help retain moisture in the soil.

How to Plant Tomatoes
Space out tomato plants 13 – 17 inches apart. Really just follow the planting instructions with the variety you choose. It will all depend on the variety of tomato you grow. You just want to make sure they will have enough room to grow and the roots not compete with each other. You can plant tomato seedlings after the last frost. Seeds can be started just before the last frost.

Keep in mind tomatoes do well in raised beds. If you are not planting in a raised bed, raise your tomato rows about six inches in the garden. Rows should be 4-5 feet apart. But, don’t forget that determinate tomato varieties grow well in containers, too!

Companion Plants for Tomatoes
Growing these companion plants around tomatoes will be helpful: basil, chives, oregano, parsley, onions, carrots, asparagus, marigolds, celery, and geraniums.
Some plants actually are bad to the health of tomato plants.
Avoid these plants around tomotoes: black walnut, corn, cabbage, potatoes, kale, and rosemary.

Maintaining Your Tomato Plants
Not sure what to do in the meantime? You will most likely need to stake your tomatoes. Again, depends on the variety. Bush tomatoes may need to be staked or caged for support. But, indeterminate tomatoes, or vine tomatoes, will definitely need support since they continue to grow all season. A trellis works nicely with vine tomatoes or a tomato cage.

Should you prune tomatoes? Depends on who you ask! Suckers, or side shoots, grow in the “v” of the stem and branch. You can pinch them off or leave them. Leaving the suckers on produces more tomatoes. But these will be smaller tomatoes. If you have a large tomato plant, like the indeterminates, you might want to prune the side shoots here and there. But don’t go hog wild, you want these plants to produce.

When to Use Organic Fertilizer
It’s a good idea to use organic fertilizer in your garden, and avoid the chemicals around your food. Typically, tomatoes are fertilized every 3-4 weeks, with the first fertilization at planting. The next time you’re ready to fertilize should be about the time the plant is bearing small tomatoes. Some determinate varieties will only be fertilized two times, since they produce tomatoes all at once.

You can also find products at nurseries, like Tomato Thrive, a microbial growth promoter, that help tomato plants absorb nutrients from the soil. This makes your fertilizer absorb better, too.

When to Harvest Tomatoes
Tomatoes take 50-80 days to harvest. Just pick them when they have turned their full color. You can pick them early and let them ripen in the windowsill. But, the best tomato flavor is one that has ripened on the vine.

Tomato Pests and Diseases
Keep an eye out for tomato hornworms. They are the large, beautiful green worms that blend nicely with the stems.
Marglobe Tomatoes
Ripened and sliced Cherokee Purple Tomato

Cherokee Purple Tomatoes with Swiss Chard and a huge Radish!
Would you like to know my favorite thing about growing tomatoes?  The taste!  You won't find a sweeter, juicier tomato than one that was freshly harvested from the garden and sliced up on the spot still warm from the heat of the sun.
Amana's Orange Tomato!  So tasty!
 I hope you have enjoyed the spotlight!  Do you have any questions about growing from seed?  Would you like a particular variety in the Spotlight?  Send me an email or leave a comment! 

Don't forget to enter the Seeds in a Stocking Giveaway!  You can choose whichever 3 seed varieties you want!

Sunday, November 25, 2012

2013 Heirloom Seed Announcement and a Giveaway!

Chioggio Beets
How was your Thanksgiving?  Ours was nice an relaxing.  We also took Saturday and Sunday off to rest which was awesome.  I had a chance to upload all new heirloom seed varieties to my "New Arrivals" page so that I'm all set for online shoppers.  *Giveaway starts at Midnight!*
Pink Oxheart Tomato


I am just amazing by all of the wonderful and unique varieties of heirloom seeds!
Royalty Purple Podded Beans
I just added the Royalty Purple Podded beans to my own garden as well as the Pink Oxheart Tomato.
Spaghetti Squash
Stowell's Sweet Corn


Next I'll add the Chioggio Beets and maybe a few of my favorite 5 Color Silverbeet Swiss Chard.  The Chard grew fantastic last season!
Golden Wax Bush Beans
Kentucky Wonder Pole Beans


Charleston Grey Watermelon
Marglobe Tomatoes


AND I mentioned a GIVEAWAY!!!   I hit 200 followers a few weeks ago but it's been crazy busy and I'm just finding the time to get organized!

I have decided to giveaway more Heirloom Seeds!  This time there's a Christmas theme!  I recently added the Seed Packs in a Stocking so I thought I'd give you a chance to win one for yourself or to give as a gift.


No wrapping required!  No Card?  No Problem!
Includes 3 seed packs of your choice, a mini stocking and a holiday card for you to personalize.


*Stockings available in Red, Green and Blue*

a Rafflecopter giveaway

Tuesday, November 20, 2012

You mean it's NOT all about me?!? Journey Update (#6)

Yes I am thankful for many things but I have decided not to share all of those things just because it is Thanksgiving.  I am thankful year-round so I'll share all of my mushiness in a later post. 
My sisters Michelle (l) and Jen (m) in Julian!  I love you both!
I love you too Mom! (not pictured)
My sister Jen (right) signing autographs in Cocoa Beach.  I love you Jen!
Our journey has had it's ups and downs.  Not surprised!  We have managed to get to the gym more often and managed to keep up with the Awesome Abs video!  Yes, we've blown it several times (like Thursday at a charity event) and I'm not even going to try to be good for Thanksgiving.

However, there are quite a few things that we can do to stay focus on our journey.

1. Stay Hydrated!
From webmd:  "Our bodies are made up of about 60% water, and every system depends on water. So water is important for healthy skin, hair, and nails, as well as controlling body temperature, heart rate, and blood pressure."
When we talk about drinking more water to our patients it's: "The water in your coffee, tea, sports drink or cocktail do not count.  8-12 glasses or 8 ounces or more per day."

2.  Get Plenty of Sleep!
A short-lived bout of insomnia is generally nothing to worry about. The bigger concern is chronic sleep loss, which can contribute to health problems such as weight gain, high blood pressure, and a decrease in the immune system’s power, reports the Harvard Women’s Health Watch.

3. Eat!
According to Livestrong: "Eating five small meals throughout the day can help you control your appetite, raise your metabolism and reduce your chances of overeating. Eating more frequently reduces your risk of obesity by decreasing the blood insulin response to long fasts that increase fat storage and weight gain, according to MayoClinic.com. It's important to plan your grazing to ensure you eat the right amount of calories and get the vitamins and minerals you need."
Eating five small meals throughout the day can help you control your appetite, raise your metabolism and reduce your chances of overeating. Eating more frequently reduces your risk of obesity by decreasing the blood insulin response to long fasts that increase fat storage and weight gain, according to MayoClinic.com. It's important to plan your grazing to ensure you eat the right amount of calories and get the vitamins and minerals you need.

Read more: http://www.livestrong.com/article/200706-how-to-eat-five-small-meals-a-day-to-lose-weight/#ixzz2CliBEDEE

4.  Stretched before and after you exercise!
Most professional athletes, trainers and Chiropractors all agree that stretching before your workout is the safest way to protect your muscles, tendons and ligaments from injury and get them in a state of readiness for exercise.  In our office we give specific stretching instructions to each patient to minimize the risk of injury or re-injury.

5.  Plan ahead to exercise!
Not everyone has a schedule that allows them to workout at the same time and day but planning ahead can make a big difference.  Not the "gym type"?  Swimming is a wonderful way to exercise and is low impact.  Walking is another great form of exercise.  You can walk around the block, around the neighborhood or even the beach.  Walking at the beach is fantastic and I do it as often as possible!

6.  Don't get discourage!
Setting unreasonable goals just might be the #1 reason people quit.  January seems to be the busiest month of the entire year at our gym.  People set the fantastic goals for new years and just fizzle.  I like to set reasonable goals and then re-assess at the end of 4 weeks.  Also, If I don't hit my goals in 4 weeks that's okay.  I set new goals and keep on working!
My Dad with the grandkids!  I love you Dad!

I'll share my final Eco-Friendly Gift Giving next week!  I'm signing off for a few days.  There's work to be done and I'm off to the gym!

Happy Thanksgiving!

Sunday, November 18, 2012

Pumpkin Smoothie

I love everything pumpkin!  My hubby...Not so much!  I finally made a pumpkin smoothie this year and I'll definitely make this again.  I was out of yogurt or I would have added a bit of organic, low-fat vanilla yogurt as well.  Maybe next time!

Pumpkin is high in fiber, low-fat and contains the anti-oxidant beta-carotene  which may reduce your risk of cancer.  Pumpkin is also a great source of potassium and vitamin C.

Deliciously Low-Fat Pumpkin Smoothie

adapted from healthful pursuits
Ingredients
1 cup milk 
(or non-dairy milk such as Soy or Almond milk)
1 cup pumpkin Puree
1/2 banana 
1 tablespoon flax seeds
1 teaspoon  pure vanilla extract
1/4 teaspoon ground cinnamon
1/8 teaspoon ground ginger
pinch ground nutmeg
pinch ground cloves
pinch all spice
Ice
Whipped topping (optional)

Instructions:
Place everything but whipped topping in the blender.
Blend until smooth
Sprinkle with cinnamon if you’d like!

*This recipe is definitely a keeper!  I can't wait to try another variation with yogurt.*

Thursday, November 15, 2012

BEANS!!!

I'm taking a break from my Eco-Friendly Gift Giving series to share about growing beans.  Yes, I am fully aware that it is November and not technically garden time (for most).   
**Since Heirloom Seeds make great gifts I'm sharing!**

In Florida I have been experimenting growing different varieties at different times of the year.  It's still 80 degrees here so I'm currently growing Pink Oxheart Tomatoes, Anaheim and Cal Wonder Bell Peppers, Green and Purple Basil.  I just recently added Royalty Purple Podded Beans (new arrival at Mary's Heirloom Seeds) and they are AMAZING!

I soaked the beans for 3 hours.  The pic above is approx 3 days.

Day 5! (above)
Day 8! (above)

With a little water and Florida sunshine I'll have Royalty Purple Podded Beans in approx 48 more days!  When they are mature they should look like this:

This morning I transplanted these babies into the garden and I'll share an update next week.  For instructions on growing beans check our the Growing From Seed page.

Wednesday, November 14, 2012

Eco-Friendly Gift-Giving (part 4) Drink It!

Are you excited about DIY gift giving?  I'm on a roll here!  Part 1 Grow It! , Part 2 Decorate It! and part 3 Spice It! were so much fun!  
On to the drinks...

I found the simplest recipes from various recipe sites and made my own little "tweaks."  These are great mixes to add to those decorated jars. 

DIY Hot Coco Mix 
2 1/2 cups non-fat dry milk powder
1 1/2 cups sugar
1/2 cups cocoa
1/2 cups non-dairy creamer
 
Mix and store in tightly covered container in a cool-dry place. Makes 5 cups mix.
For one serving, place 1/4 cup dry mix in cup and add six ounces boiling water. Stir well.
*Here's what I "tweaked" 
-1/2 cup white sugar and 1 cup powdered sugar
-3/4 cup non-dairy creamer
The first recipe just wasn't sweet enough or as creamy as I like.  My "tweaks" were perfect!!!


Homemade Capuccino Mix
Ingredients
1 cup powdered nondairy creamer
1 cup instant chocolate drink mix
2/3 cup instant coffee granules
1/2 cup sugar
1/2 teaspoon ground Ground Saigon Cinnamon
1/4 teaspoon ground nutmeg

Directions
Combine all ingredients; mix well. Store in an airtight container. To serve, add 3 tablespoons mix to 3/4 cup boiling water; stir. Yield: 16 servings (3 cups mix).

Use a large bowl to mix everything in and store is a fancy Jar!

YUM!  Have fun with the DIY mixes and stay tuned for more.  I'll share my final project as soon as I can.  It's been pretty busy here so I'm working day and night!

This is a series:
*If you have any suggestions please feel free to send me an email.  I would be happy to feature your projects!

Sunday, November 11, 2012

Eco-Friendly Gift-Giving (part 3) Spice it!

Welcome to part 3 of Eco-Friendly Gift-Giving.  
Don't forget to check out part 1 Grow It! and part 2 Decorate It!

The web has an abundance of DIY projects out there for just about everyone!  Today I'll share a few DIY Spice Mixes that are so easy you'll wonder why you're paying those ridiculous prices for store-bought  rubs and spice mixes.  I'm thinking about putting these in smaller jars to give as gifts,  I'll share a few more DIY jar crafts later in the series!

Making these yourself and packaging in recycled glass jars are a great way to save more and reduce waste.


Bulk spices saves a lots of $$
Basic Rub Mix
4 tablespoons paprika
1 ½ tablespoons cayenne
2 tablespoons freshly ground
black pepper
3 tablespoons garlic powder
3 tablespoons onion powder
3 tablespoons salt
1 ½ tablespoons oregano
1 ½ tablespoons thyme


Steak Fajita Spice blend
3 tablespoons cornstarch
2 tablespoons chili powder
1 tablespoon kosher salt
1 tablespoon paprika (for more kick, use hot paprika)
1 teaspoon onion powder
1 teaspoon garlic powder
1 teaspoon sugar
1/2 teaspoon cumin
1/2 teaspoon cayenne pepper


Homemade Rajin’ Cajun Seasoning:
1/2 cup paprika
1/3 cup Himalayan Salt or sea salt
1/4 cup Garlic Powder
2 Tablespoons Black Pepper
2 Tablespoons Onion Powder
1 Tablespoon Cayenne Pepper (optional- won’t be spicy without this)
2 Tablespoons Oregano leaf
1 Tablespoon Thyme leaf

To Make: Mix all ingredients in jar or food processor and store in an airtight container.

Recipes adapted from mama and baby love.

Save Your Jars (which started this whole series) has been featured at Homemaker on a Dime , Mop it Up Mondays and Natural Living Mama!
Giving Back was featured at  My Life's a Treasure !

This is a series of Eco-Friendly Gift Giving:
Grow It! (part 1)
Decorate It! (part 2) 

Friday, November 9, 2012

Eco-Friendly Gift Giving (part 2) Decorate it!

I mentioned a few days ago to Save Your Jars.  Today I'll finally share the why you should save them.  I use jars of all shapes and sizes for so many things.  While the items that I use may not be eco-friendly, my method is!  I did not buy anything new.  I used whatever I had on hand.  These decorated jars will be filled with cool stuff which I'll share next.

Decorate with Ribbon

First I measure and cut a ribbon to go around the top of the jar and another to around the sides.  I used a glue gun to secure the first ribbon around the sides.
The next went around the top of the jar.  I started the ribbon and a attached the end to the same area that I would attach my bow (shown below)  That way I could cover up the ends.

I cut 2 smaller pieces approx 4 inches each to make a bow. 
 Fold each piece in half an glue (I used a hot glue gun).
Then glue them them together (crisscrossed like so). Once you glues them together, glue them to your jar and add a cute button.

I made another jar and decorated it with a ribbon AND puffy paint!
I started with writing her name and then I added dots!

I'm bringing back the DIY Chalkboard Jar!  I added a bit of puffy paint for an outline and a quick ribbon (no glue).  SO EASY!!!

There are a few more jar projects I'm working on so you'll just have to stay tuned.  I'll decorate a few more and share what to fill them with !

This is a series:
Eco-Friendly Gift Giving (part 1) Grow It!